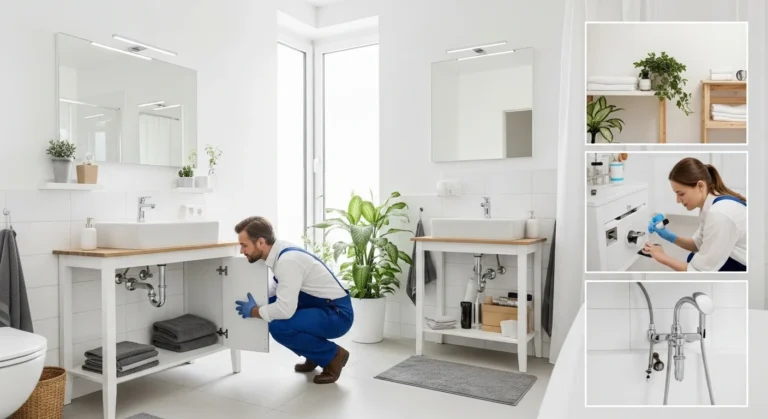
How to Remove Bathroom Sink Drain: Step-by-Step Plumbing & Maintenance Guide
If your bathroom sink isn’t draining properly or you’ve noticed an unpleasant odor, it may be time to clean or replace the drain assembly. Knowing how to remove bathroom sink drain is a simple yet valuable skill for every homeowner. It helps prevent plumbing issues, saves repair costs, and keeps your sink working efficiently.
Over time, soap scum, hair, toothpaste, and mineral buildup can clog the drain or corrode the metal parts. Removing the drain allows you to clean, inspect, or replace it completely. With a few basic tools and some patience, you can handle the task yourself without calling a plumber.
This detailed home plumbing guide walks you through every step — from preparation to reassembly — so you can get your sink flowing smoothly again.
1. Gather Your Tools and Materials
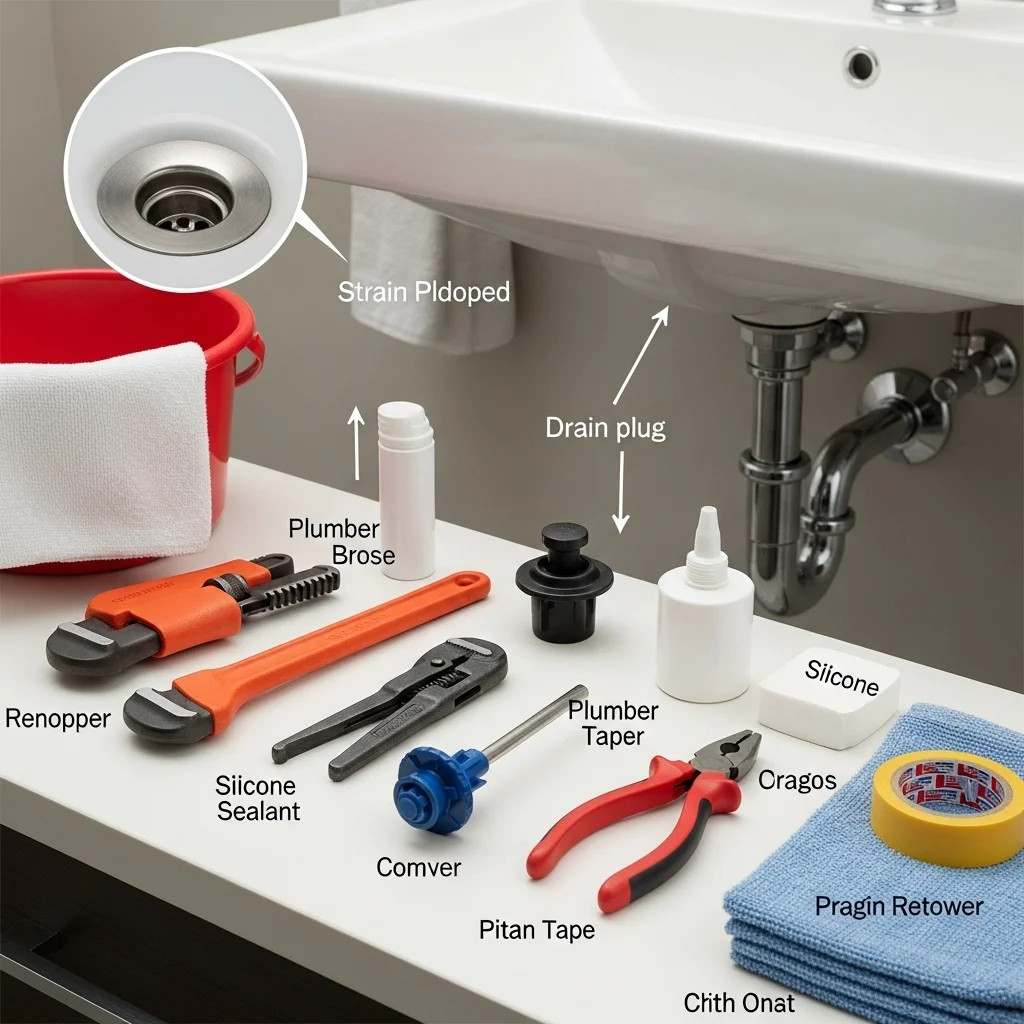
Before you start, make sure you have everything ready. You’ll need:
- Adjustable wrench or channel-lock pliers
- Bucket or bowl
- Towels or rags
- Plumber’s putty (for reinstallation)
- Screwdriver (if applicable)
- Cleaning brush or wire
Having your tools organized ensures your DIY sink removal goes smoothly without mid-project interruptions.
2. Turn Off the Water Supply
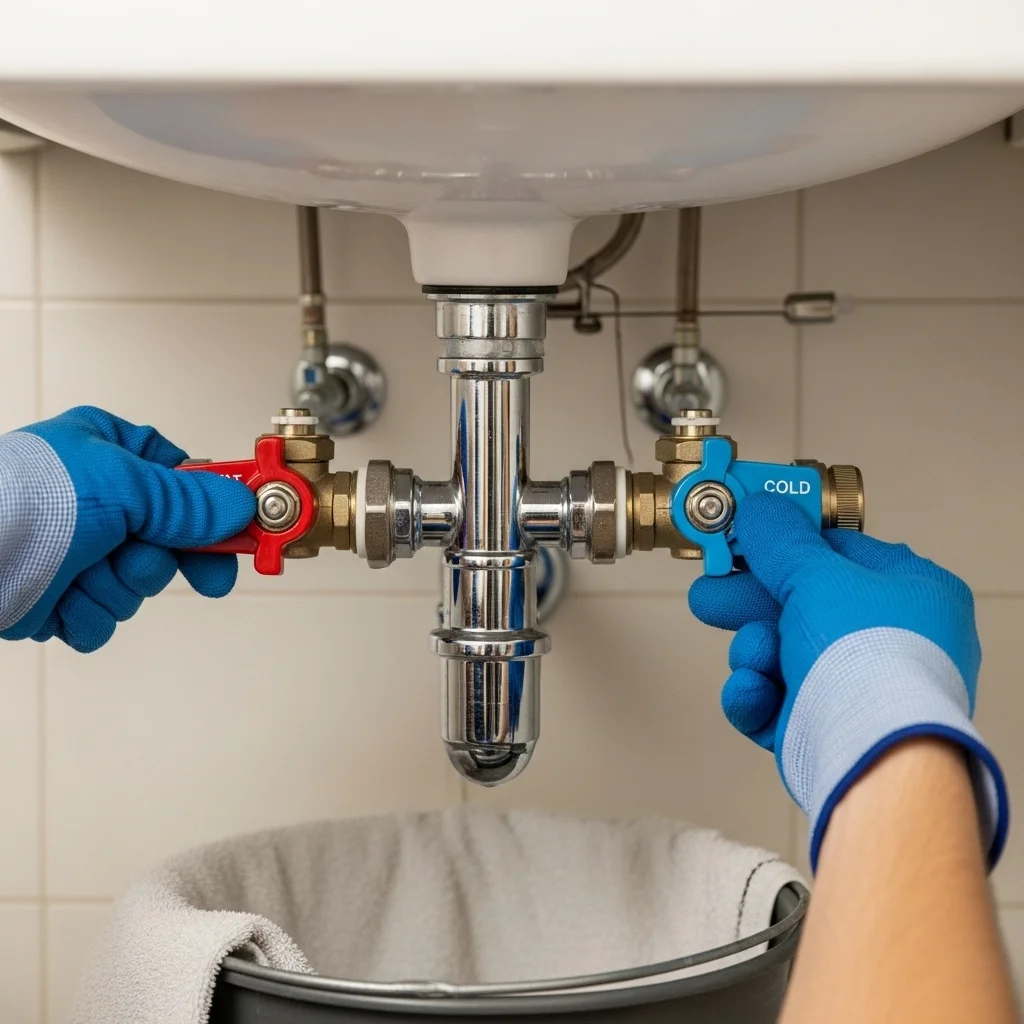
While this task doesn’t usually involve the faucet’s water lines, it’s still best practice to turn off the water valves under the sink. This precaution prevents accidental leaks or splashing during removal.
Turning off water supply valves is a small but smart part of any bathroom sink maintenance routine. It keeps your workspace dry and manageable.
3. Place a Bucket Under the Drain
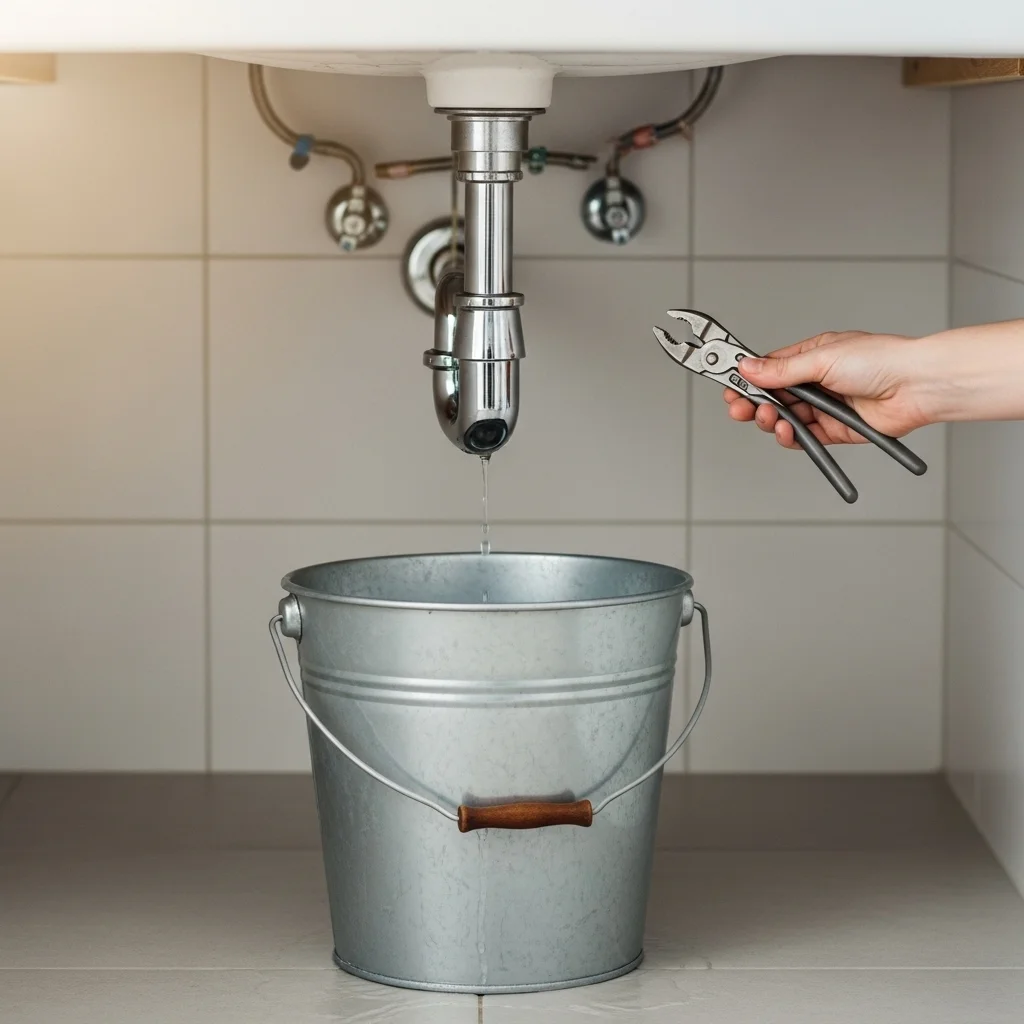
Position a bucket or small basin directly under the P-trap — the curved pipe beneath your sink. When you disconnect parts, residual water will drain out, and this container will catch it neatly.
This step helps avoid mess and water damage to your vanity cabinet or flooring. Preparation like this makes fixing clogged sink drain tasks easier and cleaner.
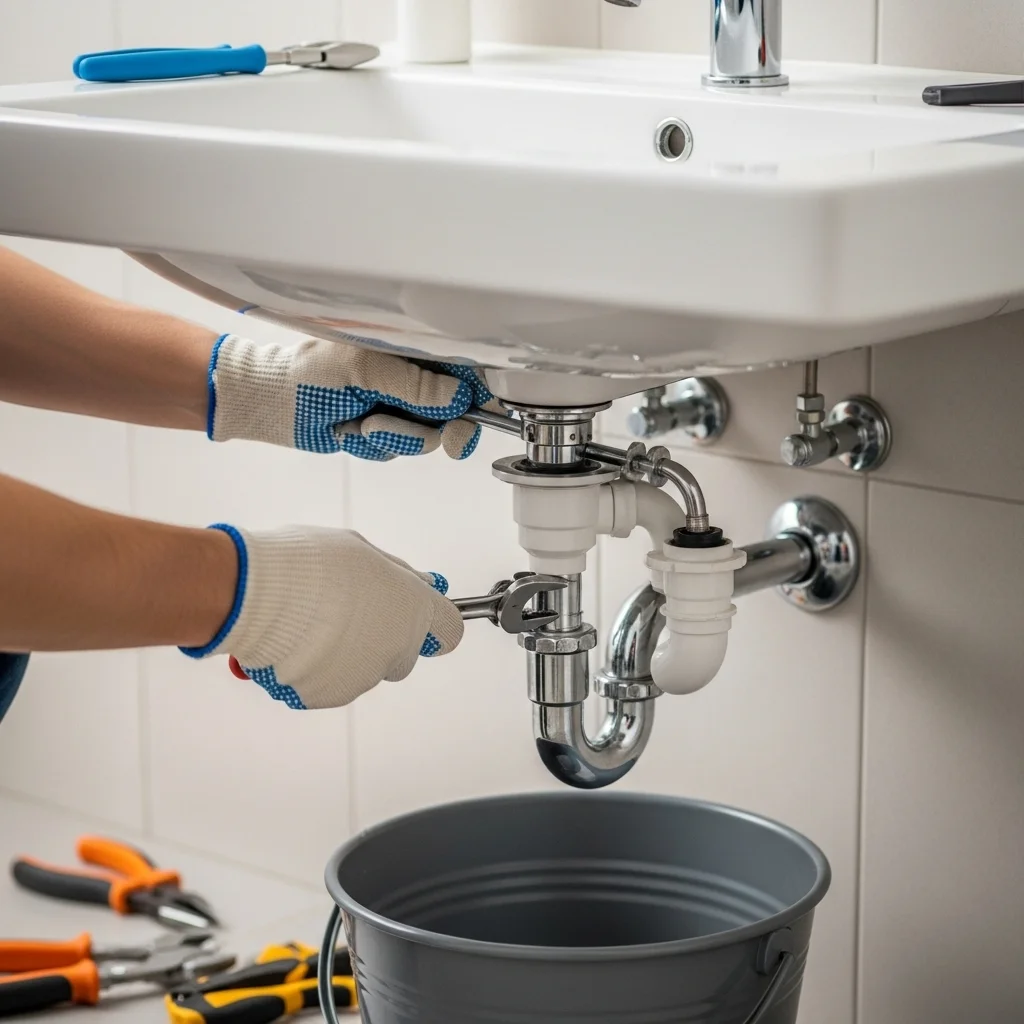
4. Loosen the P-Trap Connections
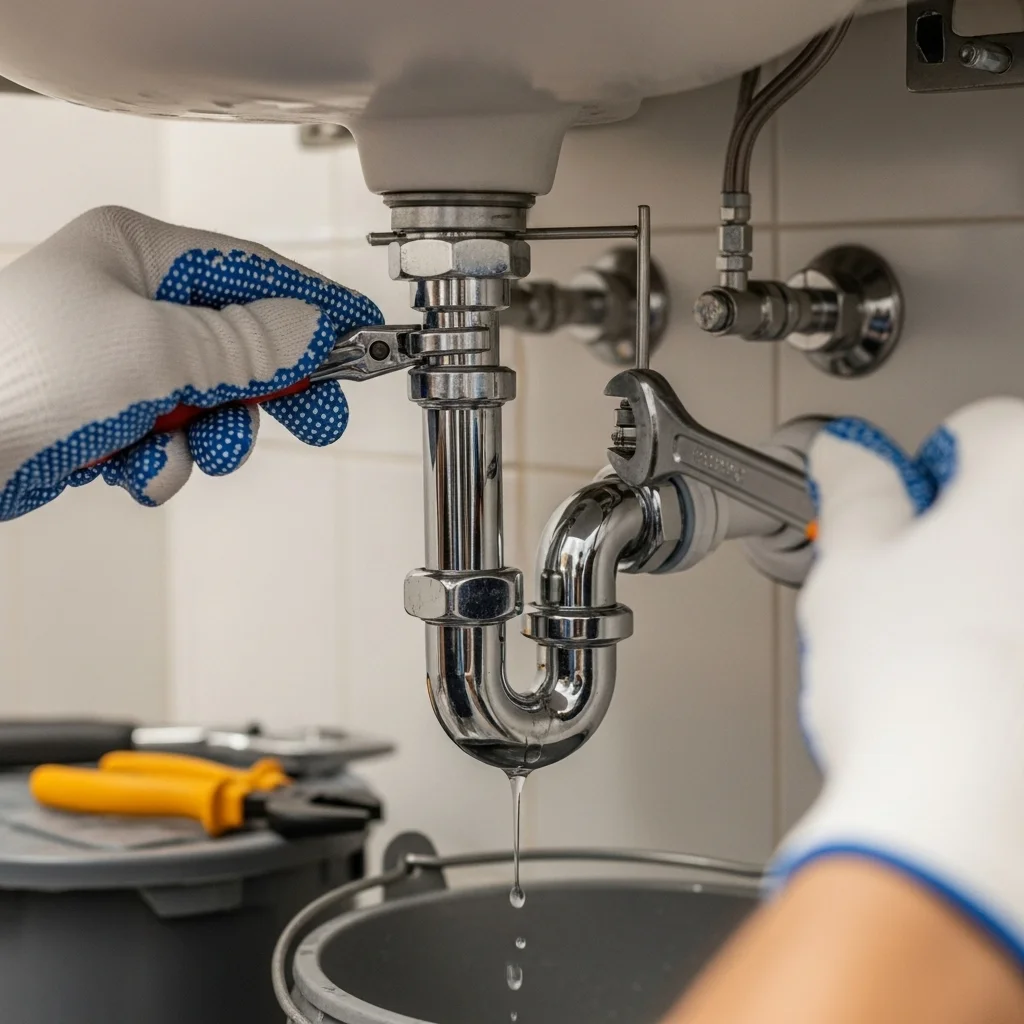
Use your pliers or wrench to loosen the slip nuts connecting the P-trap to the tailpiece (the pipe attached to your drain) and wall pipe. Carefully remove the P-trap and let the water drain into your bucket.
Set the P-trap aside — you’ll likely find debris or buildup inside. Cleaning it later can prevent future clogs and fits neatly into ongoing bathroom sink maintenance efforts.
5. Disconnect the Pivot Rod Assembly
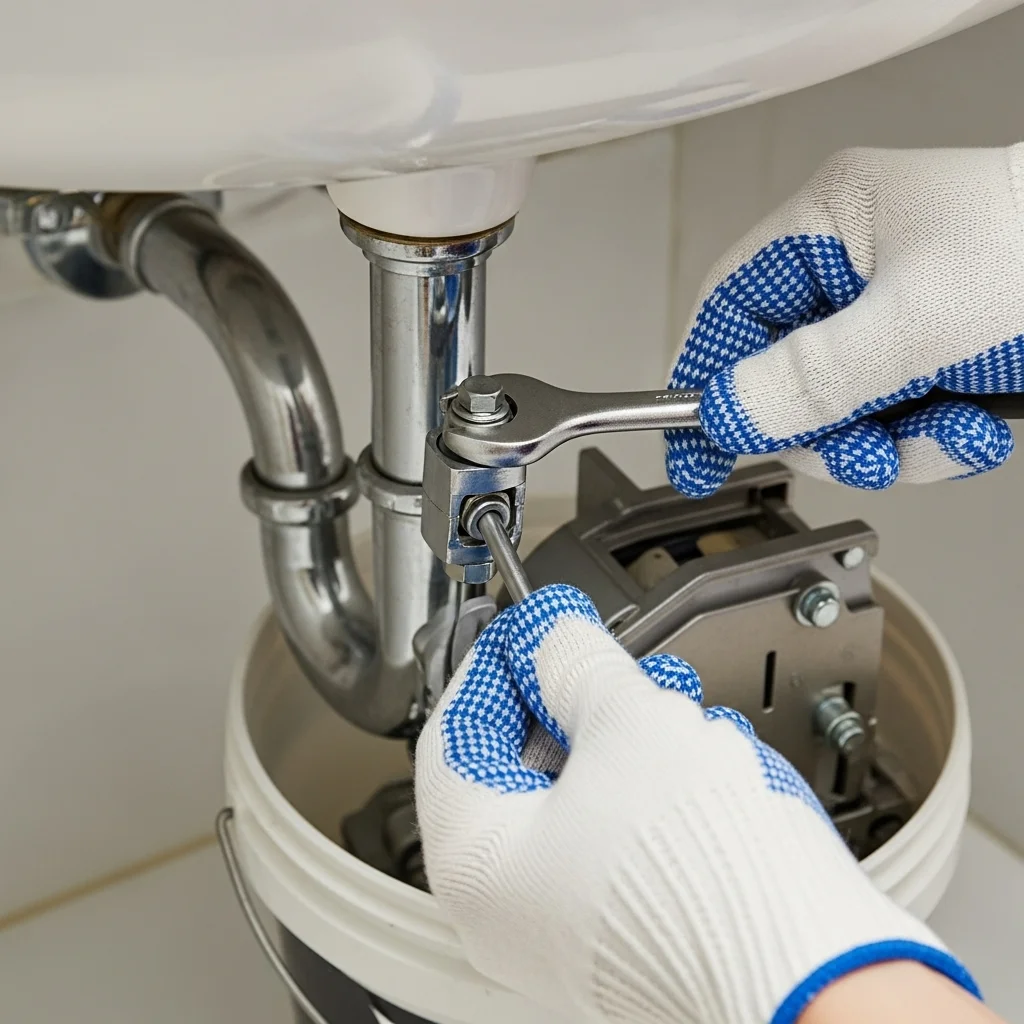
Underneath the sink, locate the horizontal rod connected to the drainpipe — this is the pivot rod, which controls the stopper mechanism. It connects to a small clip or nut. Unscrew it gently to release the rod.
Once detached, pull the rod out of the drainpipe. This allows the stopper inside the sink to lift freely, an essential step when learning how to remove bathroom sink drain completely.
6. Remove the Sink Stopper
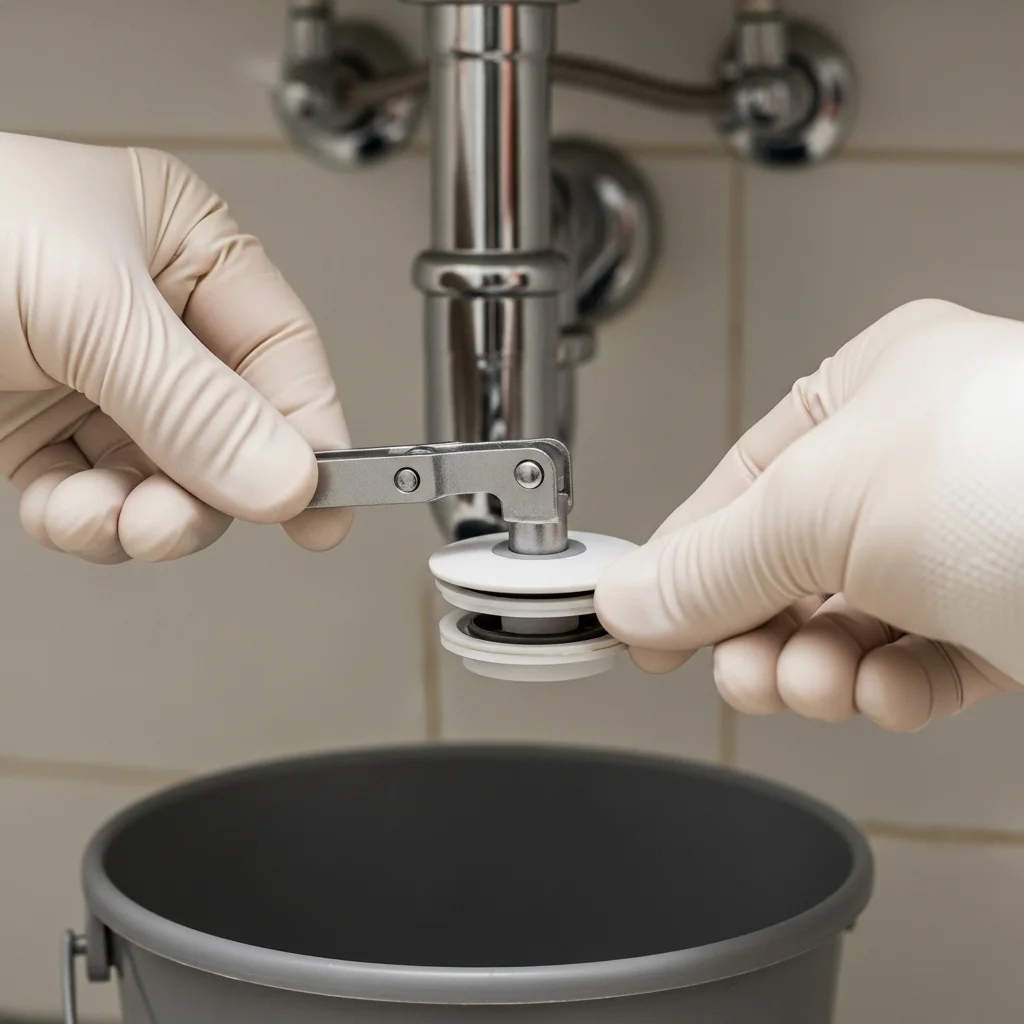
From above the sink, lift out the drain stopper. If it doesn’t come out easily, wiggle it gently — sometimes old stoppers stick due to soap or mineral buildup.
Set the stopper aside for cleaning or replacement. This small part often causes the majority of sink blockages, so a quick scrub can significantly improve drainage performance.
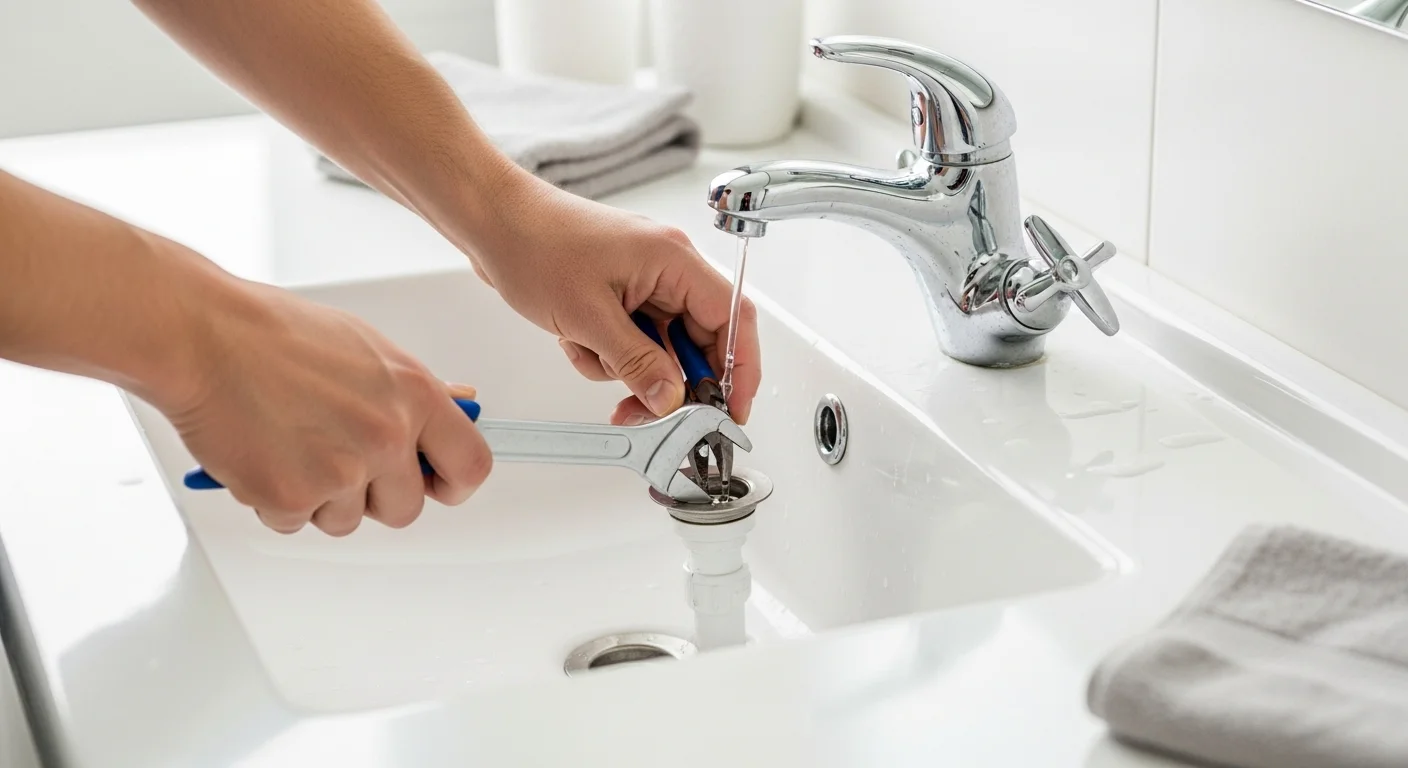
7. Unscrew the Drain Flange

Now you’ll remove the main drain body. Using pliers or your hand, unscrew the drain flange (the visible metal ring around the sink hole). You may need to hold the drain pipe below to keep it from spinning while loosening the flange above.
Once removed, lift out the drain body and set it aside. At this point, the sink drain hole will be completely open — an essential milestone in your DIY sink removal process.
8. Clean the Sink Opening and Drain Components
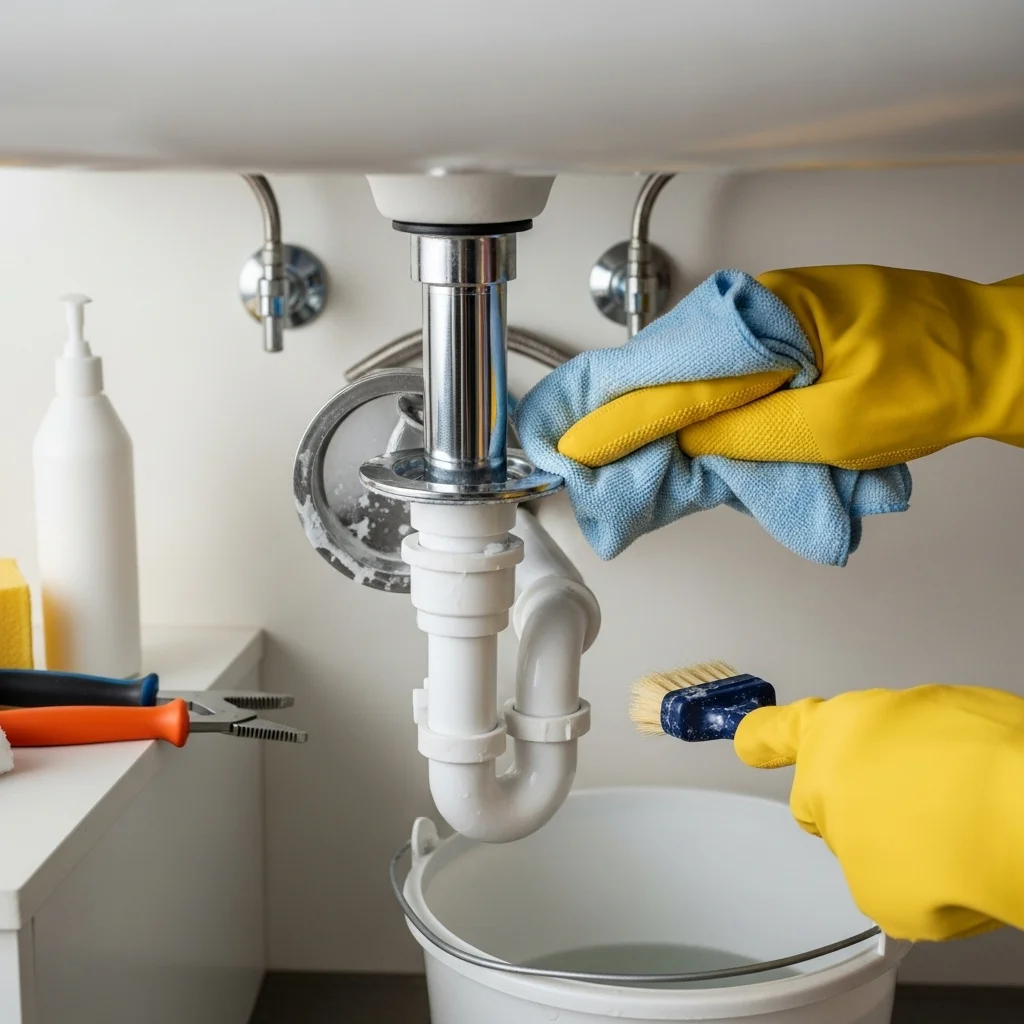
Wipe away any old plumber’s putty or grime around the sink opening. Use a brush or sponge to clean the drain threads, flange, and surrounding surfaces. Removing residue ensures a tight, leak-free seal during reinstallation.
Read also. 20 Above Toilet Storage Ideas
Cleaning is a crucial part of bathroom sink maintenance, keeping your setup efficient and odor-free. You can also inspect parts for rust or corrosion — if any look worn, replace them before reinstalling.
9. Check or Replace the Drain Pipe

If you’re removing the drain due to leaks or corrosion, now’s the perfect time to inspect or replace the tailpiece and P-trap. Replacements are inexpensive and prevent recurring issues.
When shopping for replacements, match the diameter and style of your old components. This ensures proper fit and smooth plumbing repair tips execution later.
10. Reinstall the Drain Assembly (Optional Step)
If you’re cleaning and reusing the same drain, reassemble it carefully:
- Apply a thin layer of plumber’s putty under the new or cleaned flange.
- Insert the drain body through the sink hole.
- Tighten the lock nut underneath while holding the top flange steady.
- Reconnect the pivot rod, stopper, and P-trap.
Wipe away any excess putty for a clean finish. This step ensures your sink remains watertight and properly aligned, restoring function efficiently.
11. Test for Leaks
Once everything’s reassembled, turn the water back on and run it for a few minutes. Check all connections — especially the trap and tailpiece — for drips. Tighten any joints that feel loose.
This verification step finalizes your fixing clogged sink drain or cleaning task and ensures the system runs perfectly again.
12. Dispose of Debris Responsibly
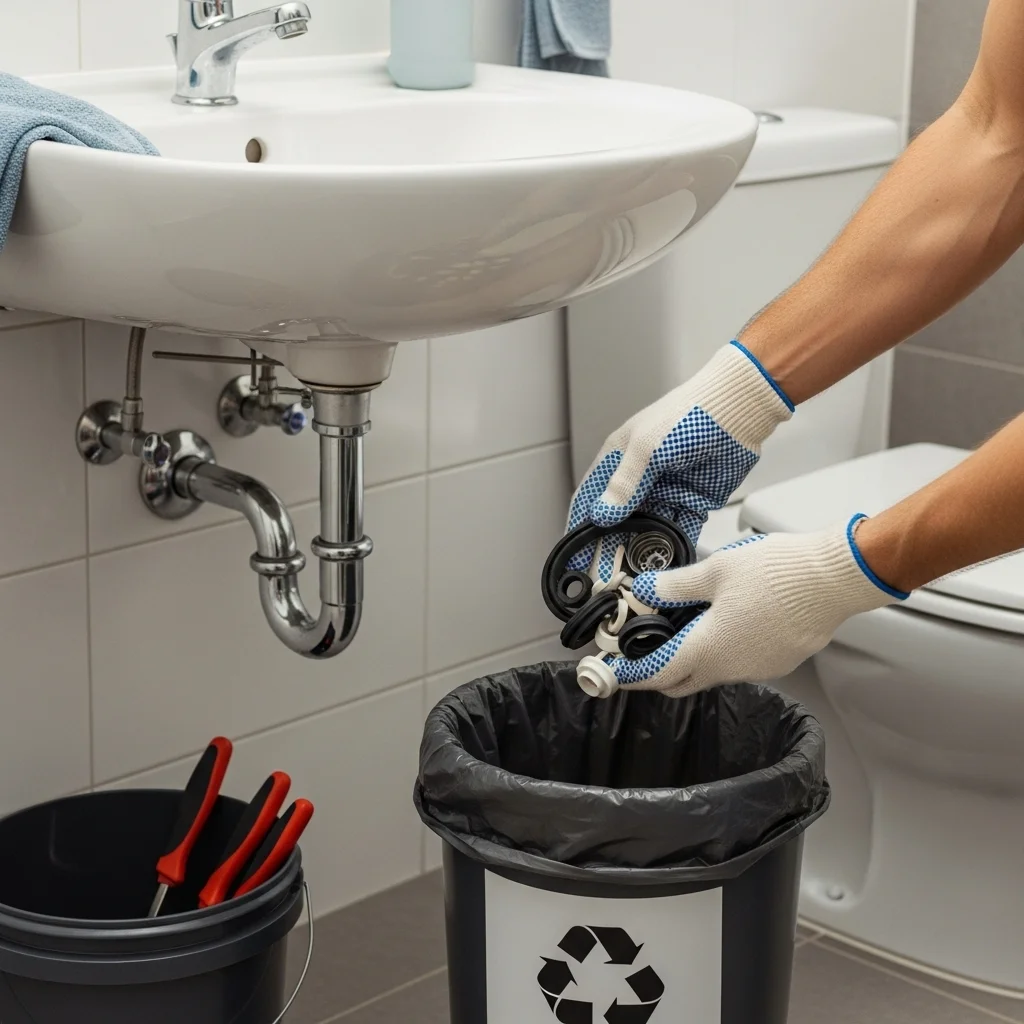
Pour the dirty water from your bucket into a toilet or outdoor drain, and wipe down tools before storing them. Avoid rinsing grime down the bathroom sink to prevent re-clogging.
Responsible cleanup is part of smart home plumbing guide habits — keeping your workspace tidy and safe after every project.
13. When to Call a Professional
If you encounter corroded parts, stuck fittings, or leaks you can’t identify, it’s time to call a licensed plumber. Professionals can replace complex assemblies quickly and safely without damaging fixtures.
Even if you prefer DIY, knowing when to ask for help is one of the most practical plumbing repair tips you can follow.
14. Regular Maintenance Tips

To avoid frequent clogs or buildup, follow these simple care tips:
- Pour boiling water down the drain weekly to melt residue.
- Avoid dumping hair, grease, or heavy soap into the sink.
- Use a strainer to catch debris.
- Check the stopper monthly for grime.
These proactive habits keep your drain running smoothly and extend its life — part of consistent bathroom sink maintenance that every homeowner should adopt.
15. Benefits of Learning Basic Sink Repair
Knowing how to remove bathroom sink drain yourself saves time, prevents costly plumbing visits, and builds confidence in handling home maintenance. Plus, clean drains reduce odors and improve water flow instantly.
A little hands-on skill goes a long way. Whether you’re fixing clogs or replacing an old assembly, these DIY sink removal steps empower you to keep your bathroom functional, fresh, and stress-free.
Final Thoughts
Removing your bathroom sink drain might seem intimidating, but with the right tools and careful steps, it’s a simple, rewarding DIY project. Understanding the process strengthens your home plumbing guide knowledge and ensures you can handle future maintenance confidently.
By combining smart preparation, cleanliness, and precision, you’ll keep your sink performing perfectly for years. Next time your drain slows or leaks, you’ll know exactly what to do — no plumber required.