THE THIEF WITH CHRISTMAS GIFT BAG CROCHET PATTERN
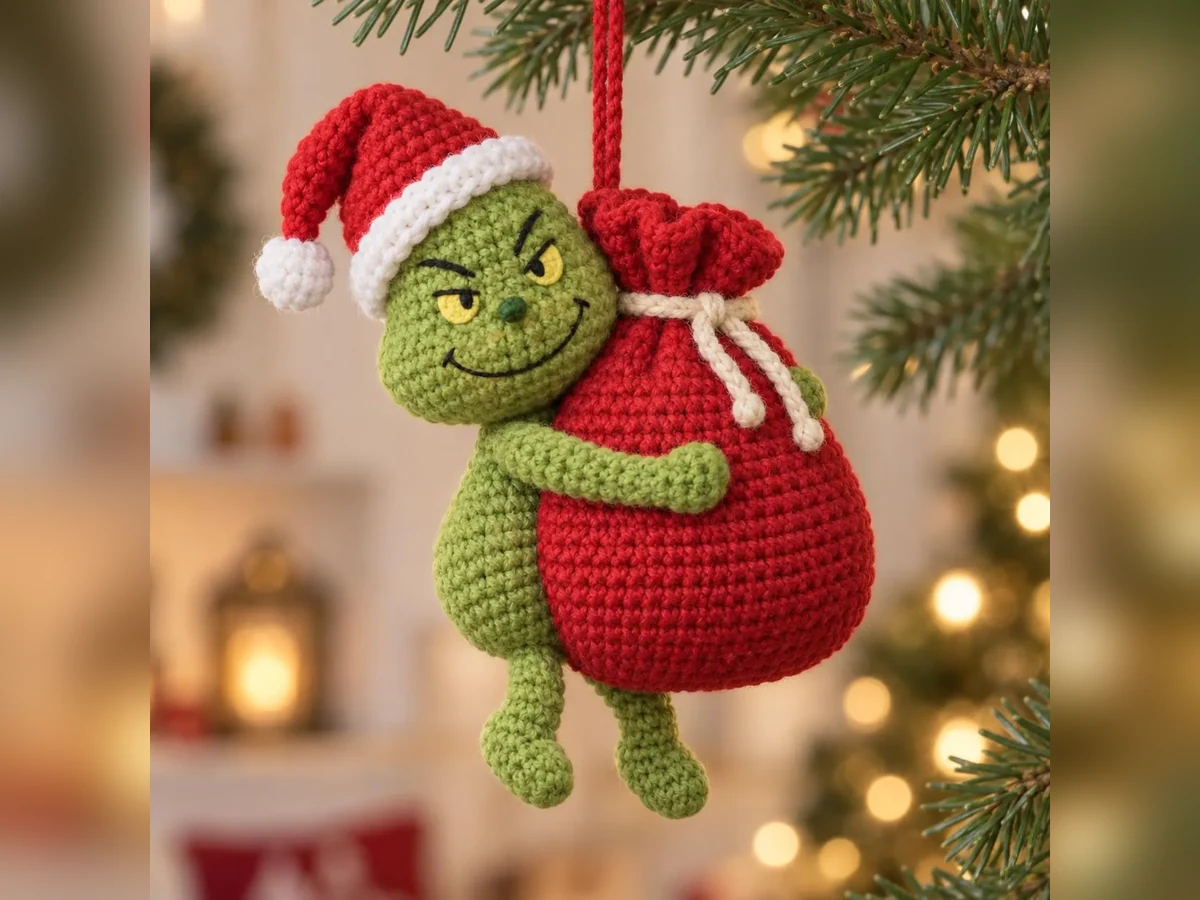
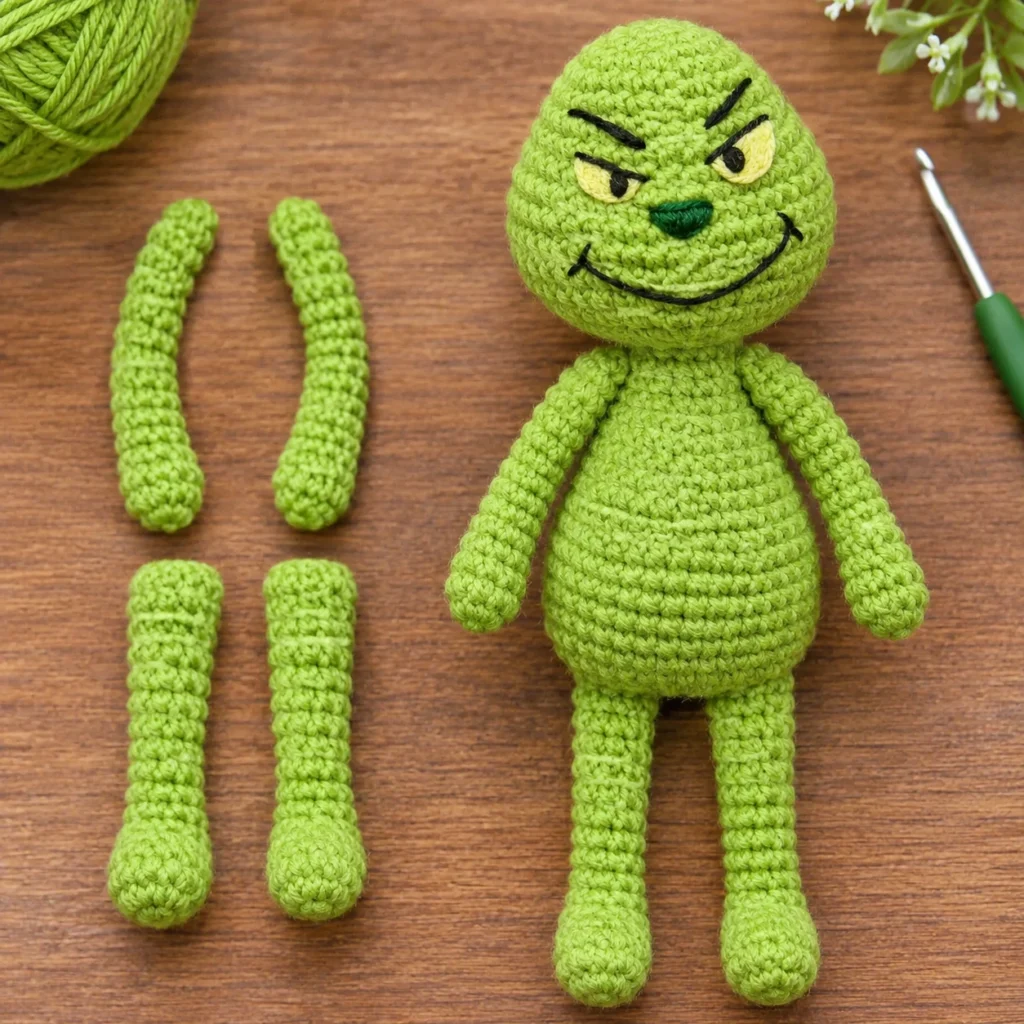
Create a mischievous Christmas character carrying an oversized red gift bag. This handmade crochet ornament features a green character, expressive embroidered face, floppy red Santa hat, long green arms and legs, and a large red Christmas sack with a cream drawstring.
Finished Size
Approximately 9–11 inches tall, depending on yarn, hook size, and stuffing.
Skill Level
Intermediate
Materials
- Green cotton or acrylic yarn – 70–90 g
- Red yarn – 65–80 g
- White yarn – 15–20 g
- Black embroidery thread – small amount
- Yellow yarn – small amount
- Dark green yarn – small amount
- 3.0 mm crochet hook
- Fiberfill stuffing
- Yarn needle
- Stitch markers
- Scissors
- Two small black safety eyes, or black embroidery thread
- Optional small amount of blush pink yarn for cheeks
Abbreviations (US Terms)
- MR – Magic Ring
- ch – Chain
- sc – Single Crochet
- hdc – Half Double Crochet
- dc – Double Crochet
- sl st – Slip Stitch
- inc – Increase (2 sc in one stitch)
- dec – Invisible Decrease
- st/sts – Stitch/Stitches
- rnd – Round
- rep – Repeat
Pattern Notes
- Work the head, body, arms, legs, and gift bag in continuous rounds unless instructed otherwise.
- Use a stitch marker at the beginning of every round.
- Stuff the head, body, arms, and legs firmly but do not overstuff.
- The gift bag should be lightly stuffed so it keeps its rounded shape.
- The character’s arms and bag are attached separately to create the hugging pose.
Part 1 – Green Character Head
Use green yarn.
Rnd 1: Make MR and work 6 sc into the ring. (6)
Rnd 2: Inc in every st around. (12)
Rnd 3: Sc in next st, inc in next st. Rep around. (18)
Rnd 4: Sc in next 2 sts, inc in next st. Rep around. (24)
Rnd 5: Sc in next 3 sts, inc in next st. Rep around. (30)
Rnd 6: Sc in next 4 sts, inc in next st. Rep around. (36)
Rnd 7: Sc in next 5 sts, inc in next st. Rep around. (42)
Rnds 8–14: Sc in each st around. (42)
Rnd 15: Sc in next 5 sts, dec over next 2 sts. Rep around. (36)
Rnd 16: Sc in each st around. (36)
Rnd 17: Sc in next 4 sts, dec over next 2 sts. Rep around. (30)
Rnd 18: Sc in next 3 sts, dec over next 2 sts. Rep around. (24)
Insert the safety eyes between Rnds 11 and 12, approximately 7 stitches apart. Position them toward the front of the head.
Begin stuffing the head with fiberfill.
Rnd 19: Sc in next 2 sts, dec over next 2 sts. Rep around. (18)
Rnd 20: Sc in next st, dec over next 2 sts. Rep around. (12)
Add more stuffing to create a firm, rounded head.
Rnd 21: Dec around. (6)
Fasten off, close the remaining opening, and weave in the yarn end.
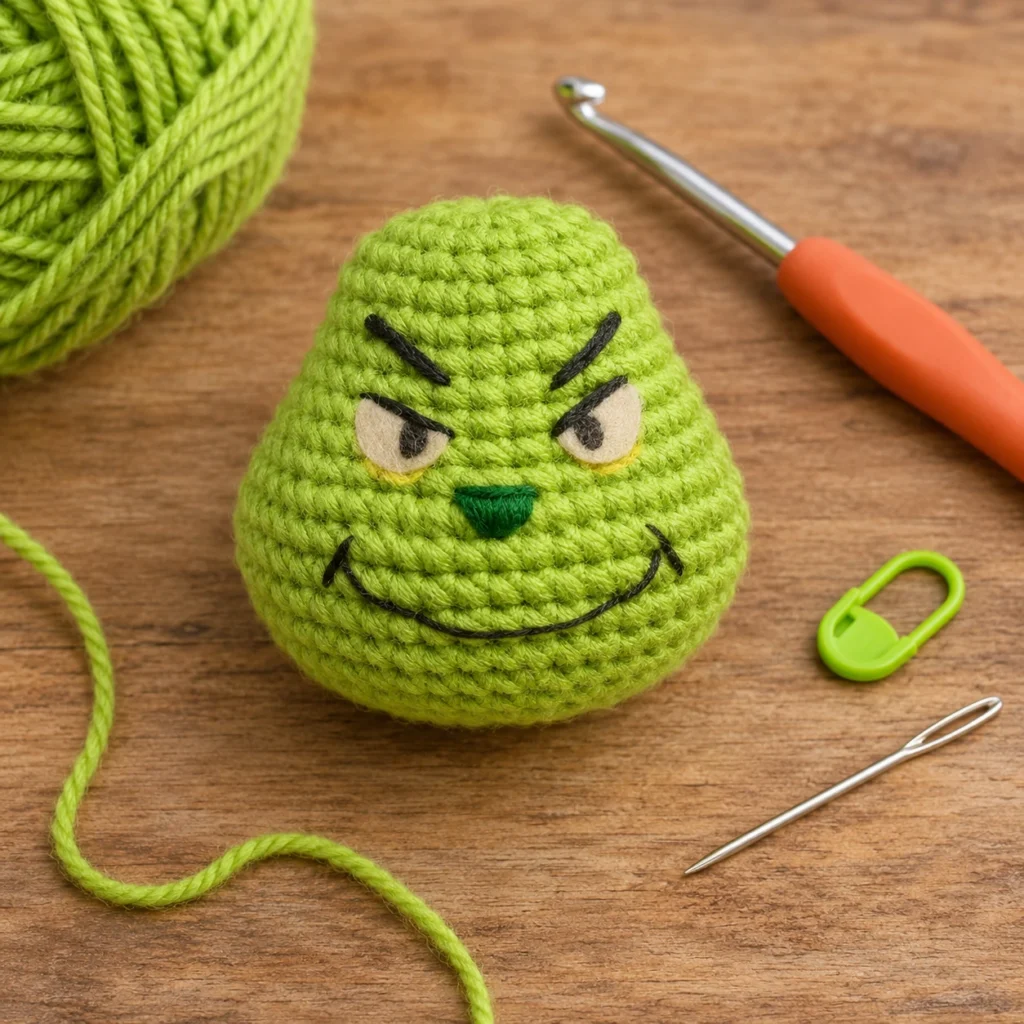
Part 2 – Facial Details
Use black embroidery thread, yellow yarn, and dark green yarn.
- Embroider two slightly angled black eyebrows above the eyes.
- Use yellow yarn to make a small curved detail around the lower part of each eye, creating the mischievous half-closed expression.
- Use dark green yarn to embroider a small round nose in the center of the face.
- With black thread, embroider a wide curved smile across the lower face.
- Add a short upward curve at one corner of the smile to create the cheeky expression.
- Add a tiny black stitch at each end of the smile.
Keep the facial embroidery flat and secure. Do not pull the thread tightly enough to distort the head.
Part 3 – Green Character Body
Use green yarn.
Rnd 1: Make MR and work 6 sc into the ring. (6)
Rnd 2: Inc in every st around. (12)
Rnd 3: Sc in next st, inc in next st. Rep around. (18)
Rnd 4: Sc in next 2 sts, inc in next st. Rep around. (24)
Rnd 5: Sc in next 3 sts, inc in next st. Rep around. (30)
Rnds 6–11: Sc in each st around. (30)
Rnd 12: Sc in next 3 sts, dec over next 2 sts. Rep around. (24)
Rnds 13–16: Sc in each st around. (24)
Rnd 17: Sc in next 2 sts, dec over next 2 sts. Rep around. (18)
Rnd 18: Sc in each st around. (18)
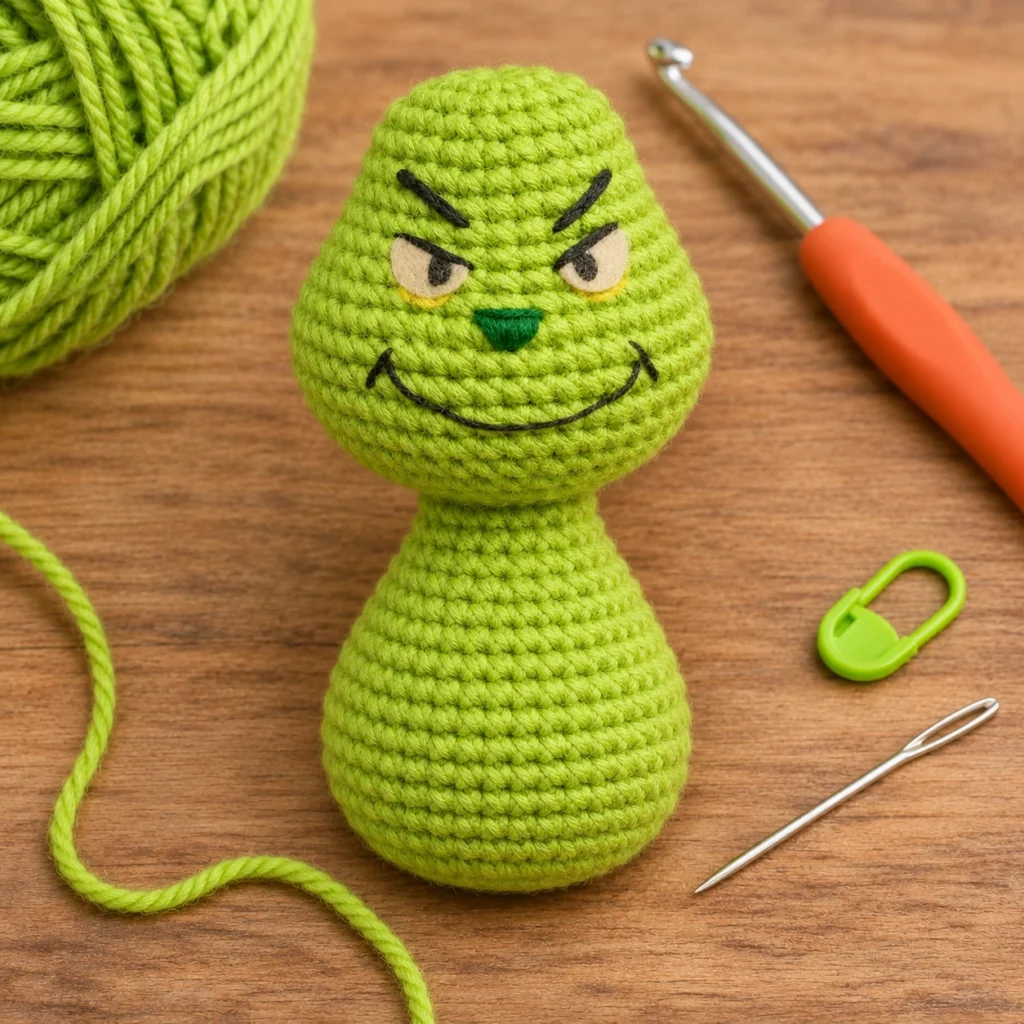
Stuff the body firmly, keeping the upper opening accessible for joining the head.
Fasten off, leaving a long sewing tail.
Position the head above the body. Sew the 18-stitch body opening securely to the lower center of the head. Add a few extra stitches at the back of the neck for support.
Part 4 – Green Arms
Make 2 identical arms using green yarn.
Rnd 1: Make MR and work 6 sc into the ring. (6)
Rnd 2: Sc in next 2 sts, inc in next st. Rep around. (8)
Rnds 3–15: Sc in each st around. (8)
Stuff the lower half of the arm lightly. Keep the upper end flatter for sewing.
Fasten off, leaving a long sewing tail.
Flatten the opening and sew through both layers to close it.
Make the second arm in the same way.
Arm Attachment
- Place the first arm on the side of the upper body.
- Position it so the arm extends forward toward the gift bag.
- Sew the upper end securely to the body.
- Repeat with the second arm.
- Curve both arms around the front and sides of the bag.
- Use a few small hidden stitches to attach the hands to the bag.
The arms should look as if the character is hugging and holding the large sack.
Part 5 – Green Legs
Make 2 identical legs using green yarn.
Rnd 1: Make MR and work 6 sc into the ring. (6)
Rnd 2: Inc in every st around. (12)
Rnd 3: Sc in next 3 sts, inc in next st. Rep around. (15)
Rnds 4–8: Sc in each st around. (15)
Rnd 9: Sc in next 3 sts, dec over next 2 sts. Rep around. (12)
Rnds 10–13: Sc in each st around. (12)
Stuff the foot firmly and the upper leg lightly.
Flatten the top opening and sew through both layers to close it.
Fasten off, leaving a long sewing tail.
Make the second leg in the same way.
Leg Attachment
Position the legs at the lower front of the body, approximately 4 stitches apart. Sew each leg securely to the lower body.
Angle the feet slightly outward so both legs hang naturally below the character.
Part 6 – Red Christmas Gift Bag
Use red yarn.
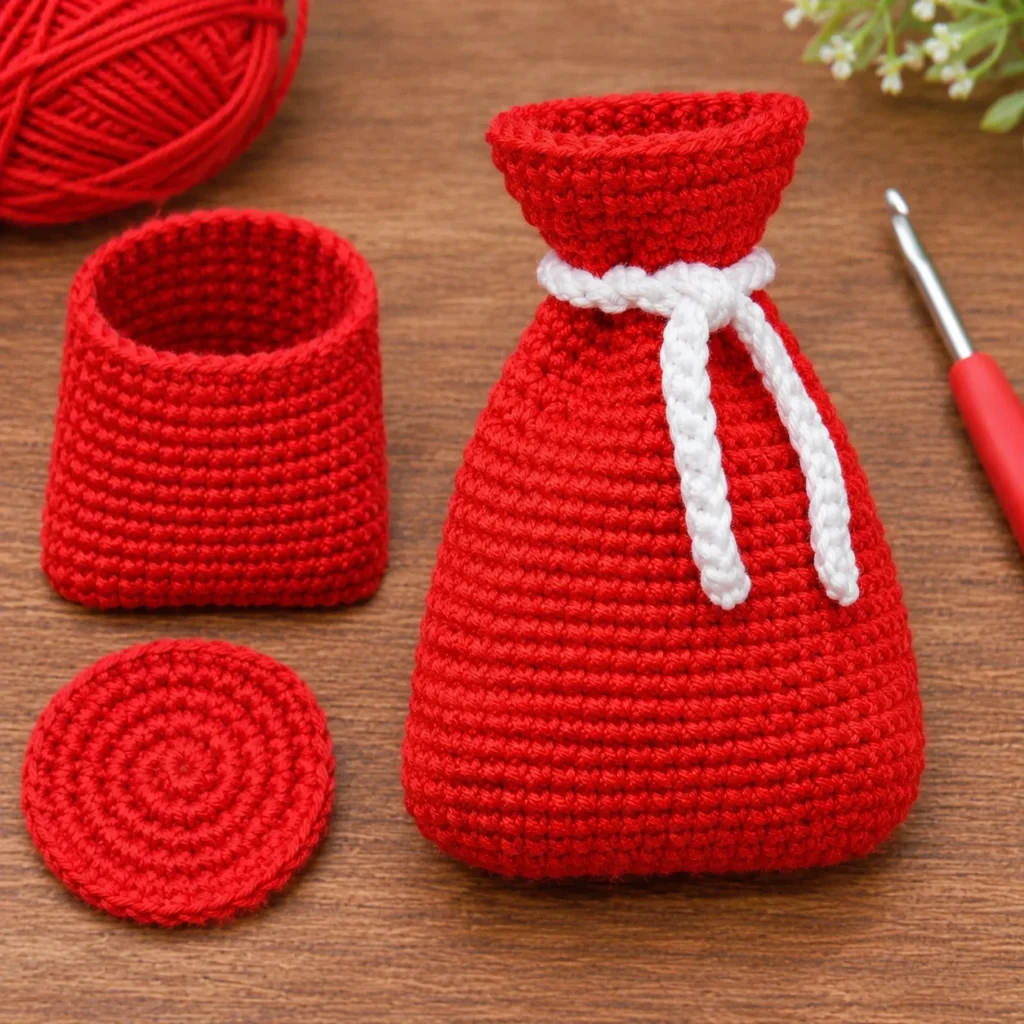
The gift bag is made from an oval base and a rounded sack body.
Oval Base
Foundation: Ch 11.
Rnd 1: Sc in 2nd ch from hook and in next 8 ch, work 3 sc in last ch. Continue along the opposite side of the foundation chain with 8 sc, then work 2 sc in the final chain. (22)
Rnd 2: Inc in first st, sc in next 8 sts, inc in next 3 sts, sc in next 8 sts, inc in next 2 sts. (28)
Rnd 3: Sc in next st, inc in next st, sc in next 8 sts, sc in next st, inc in next st. Rep 3 times, sc in next 8 sts, sc in next st, inc in next st. Rep 2 times. (34)
Rnd 4: Sc in each st around, working in the back loop only. (34)
Gift Bag Body
Rnd 5: Sc in each st around. (34)
Rnd 6: Sc in next 5 sts, inc in next st. Rep around, adjusting the final repeat evenly. (40)
Rnd 7: Sc in each st around. (40)
Rnd 8: Sc in next 6 sts, inc in next st. Rep around. (45)
Rnds 9–17: Sc in each st around. (45)
Rnd 18: Sc in next 7 sts, inc in next st. Rep around. (50)
Rnds 19–23: Sc in each st around. (50)
Rnd 24: Sc in next 8 sts, inc in next st. Rep around. (55)
Rnds 25–27: Sc in each st around. (55)
Fasten off.
Stuff the lower part of the bag lightly. Keep the upper opening wide and soft. The sack should look full and rounded, not like a flat rectangle.
Part 7 – Cream Drawstring
Use white or cream yarn.
Ch 65.
Sl st in 2nd ch from hook and in each remaining ch.
Fasten off, leaving both ends long enough to tie.
Thread the cord through the upper edge of the red bag, passing it in and out between stitches.
Pull both ends gently to gather the opening.
Tie the ends into a loose bow at the front side of the bag. Leave two cord ends hanging down, as shown in the reference.
Part 8 – Red Santa Hat
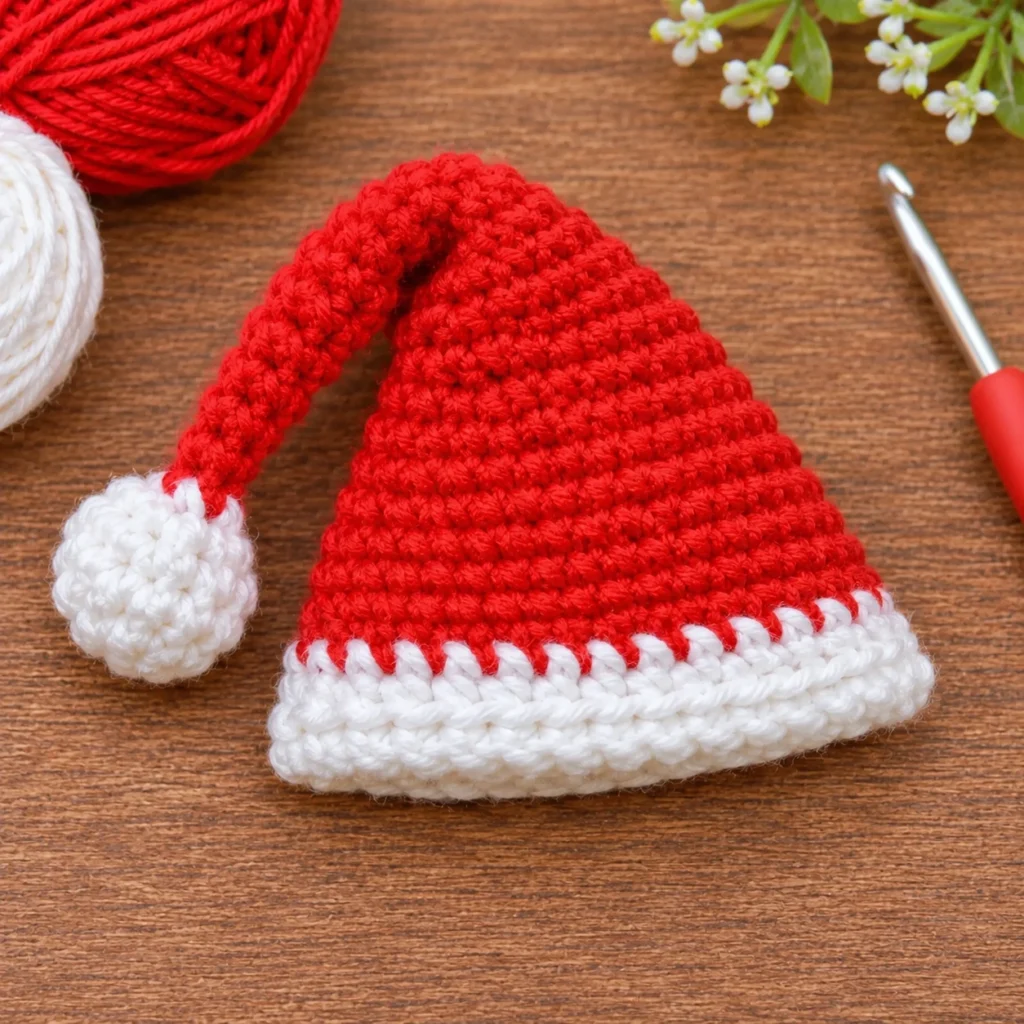
Use red yarn.
Rnd 1: Make MR and work 6 sc into the ring. (6)
Rnd 2: Inc in every st around. (12)
Rnd 3: Sc in next st, inc in next st. Rep around. (18)
Rnd 4: Sc in next 2 sts, inc in next st. Rep around. (24)
Rnd 5: Sc in next 3 sts, inc in next st. Rep around. (30)
Rnd 6: Sc in next 4 sts, inc in next st. Rep around. (36)
Rnds 7–10: Sc in each st around. (36)
Rnd 11: Sc in next 5 sts, inc in next st. Rep around. (42)
Rnds 12–14: Sc in each st around. (42)
Fasten off.
The hat should have a rounded crown and enough width to sit over the upper part of the head.
Hat Brim
Join white yarn to the lower edge of the hat.
Rnd 1: Ch 1, sc evenly around. (42)
Rnds 2–3: Ch 1, sc in each st around. (42)
Sl st to join and fasten off.
Hat Tip
Use red yarn.
Ch 12.
Row 1: Sc in 2nd ch from hook and across. (11)
Rows 2–5: Ch 1, turn, sc in each st across. (11)
Fasten off.
Fold this strip lengthwise and sew the long edges together to form a narrow tube. Curve the tube gently downward.
Sew one end to the top of the hat and attach a small white pom-pom to the hanging tip.
Part 9 – White Hat Pom-Pom
Use white yarn.
Rnd 1: Make MR and work 6 sc into the ring. (6)
Rnd 2: Inc in every st around. (12)
Rnds 3–4: Sc in each st around. (12)
Rnd 5: Sc in next st, dec over next 2 sts. Rep around. (8)
Stuff lightly.
Rnd 6: Dec around. (4)
Fasten off and close the opening.
Sew the pom-pom securely to the end of the red hat.
Part 10 – Hat Assembly
- Place the red hat on the head.
- Position the white brim just above the eyebrows.
- Sew the brim to the head at several points.
- Curve the red hat tip toward one side.
- Attach the white pom-pom at the tip.
- Adjust the hat so it sits slightly tilted, matching the reference.
Part 11 – Gift Bag Attachment
Place the red gift bag against the character’s front and slightly to one side.
- Position the top of the bag close to the character’s shoulder.
- Sew a small section of the upper bag edge to the side of the character’s head or upper body to support the bag.
- Sew the lower side of the bag lightly to the body.
- Bring both green arms forward around the sack.
- Sew the arms to the front of the bag using small hidden stitches.
- Keep the cream drawstring visible at the top.
Do not sew the entire bag flat against the body. Leave its rounded front visible.
Part 12 – Hanging Loop
Use red yarn.
Ch 30.
Sl st in 2nd ch from hook and in each remaining ch.
Fasten off, leaving a long sewing tail.
Fold the cord into a loop and sew both ends securely to the top back of the character’s hat.
Reinforce the attachment with several stitches so the ornament can hang safely.
Part 13 – Final Assembly
- Check that the head is firmly attached to the body.
- Position the Santa hat at a slight angle.
- Secure the hat brim and pom-pom.
- Check the embroidered eyebrows, eyes, nose, and smile.
- Sew both arms to the upper sides of the body.
- Attach both legs to the lower body.
- Position the red gift bag against the front and side.
- Secure the bag without flattening its rounded shape.
- Wrap the green arms around the sack.
- Arrange the cream drawstring and two hanging ends.
- Attach the red hanging loop behind the hat.
- Hide all loose yarn ends inside the crochet pieces.
Finished Design
Your finished Christmas ornament features a green mischievous character wearing a floppy red Santa hat with a white brim and pom-pom. The character holds a large rounded red Christmas gift bag with a cream drawstring, while its green arms wrap around the sack and its two legs hang below the body.
Pattern Note: This is a photo-inspired construction pattern, not the original designer’s tested stitch chart. Before making the final ornament, check the bag against the character’s body and adjust the bag size or arm placement to match your yarn tension and preferred proportions.